


 A full backup means duplicating your Mac's entire internal drive to a second volume, an external drive. This is done using a backup utility app such as Time Machine, or a clone app like SuperDuper or Carbon Copy Cloner (covered below). By having all data stored on two drives, your files will not be lost when a drive fails - and they all fail eventually - as long as your backup is properly configured and kept current.
Check internal drive capacity and use an external backup drive of equal or greater capacity. Keep it current and use it for backup only. Cloud backup may not be good enough. Here's why: Cloud backup is better than nothing, but best option is a full and current backup on an external drive in your possession. In the event of a machine failure, you may need to download and reinstall the OS before you can restore your personal files, but you shouldn't lose anything.
Many people store photos and video on the cloud to free up space on their device, but very few store everything up there. Without a backup drive, files that are not stored on the cloud will likely be lost. Having an external backup drive, with or without cloud storage, is still the best option.
Storing data on the cloud allows files to be shared among multiple devices and can free-up precious storage space on iPhones and iPads. things to consider:
Apple has eliminated the ability to make a full and complete (bootable) backup volume that includes the Operating System, after OS 10.14 Mojave. Starting with 10.15 Catalina, the OS cannot be copied to backup and must be downloaded from Apple. As a result, you may be forced to update or upgrade your OS depending on what Apple allows.
Apple has added security features that can lead to disaster. If you lose access to your Apple Account, you not only risk losing files stored on iCloud, but your devices may be bricked. if "Find My" is active on iPhone, iPad and/or Mac, losing your AppleID (now known as Apple Account) may cause Activation Lock to disable your device(s). If you cannot login to your Apple Account - lost password, changed email or phone number - here is what Apple offers: Link
You might try logging in, correct any problem you find, and WRITE DOWN your account information somewhere safe. Be sure to update your account if you change email server, email address or phone number. Or, you can turn off "Find My" and remove protected devices from your account.
  Time Machine backup not recognized? The change to Apple processors (M1 and later), and later OS versions, may prevent your Time Machine backup from being recognized following an OS upgrade. A variety of factors - hard drive versus solid-state, OS version, drive format and age - can result in external drive not mounting properly. Doesn't mean the drive is damaged or data is missing, only that you may need a solid-state drive (SSD) and new backup.
Backup is more important than ever Apple's built-in Time Machine backup app may not be first choice for backup from newer OS versions, partly because security features prevent making a full and complete backup as was common practice prior to Catalina 10.15. Starting with Catalina, Apple moved the OS to its own partition, excluded from the backup process - meaning backup programs can no longer copy the OS - not Time Machine nor any of the clone apps. Your Mac's OS must now be downloaded from Apple before restoring files from backup - which presents some problems we will get into, beginning with Startup Security.
How to disable or reduce Startup Security
Start with machine shutdown and OFF, then startup in Recovery mode:
Intel Macs: Press and hold left Command key + R during startup until Apple logo appears onscreen, then release keys. This boots into Recovery mode.
M1/M2 Macs: Hold power button down for 10-15 seconds until startup options appear. Select Options, continue, and following prompts.
Once booted into Recovery mode, open Utilities menu in MenuBar and select Startup Security Utility (or Security Policy). Depending on your OS version and machine, this will present one of the windows illustrated below:
 Utilities menu in Recovery on newer Macs with Apple CPU
Older Intel Macs don't have Startup Security; instead, they present the old Firmware lock option. DON'T DO IT! This message will give you an idea of where we're headed; no password = no access or recovery in the event of a machine failure.
 Older Intel Macs still utilize the ol' Firmware lock that can ruin your day
Newer Macs with OS 11 Big Sur or later show the new security options that can permanently lock you out of your own Mac and may even brick the machine if anything goes wrong. In the event of a failure, your only hope of recovering data may require access from another drive or machine, and settings shown below are designed to prevent such access, sans password.
 Security settings from Recovery in MacOS 11 Big Sur and OS 12 Monterey
Secure Boot settings shown above (default) effectively prevent data recovery, troubleshooting or access. Do yourself a huge favor and set these to No Security and Allow booting, if you can - these options may not be available in some OS versions.
It gets worse after MacOS 12 Monterey
Early versions of OS 13 Ventura eliminated both the No Security setting (above), and the Allow booting option. Early Ventura Startup Security looks like this, set to "Reduced":
 Startup Security from early OS 13 Ventura has no OFF setting, only a Reduced option
What all these security changes mean, even if set to "Reduced" as shown, is that M1 and later Macs can no longer:
In order to restore a Mac running Big Sur or later, you must download and install OS from Apple, then migrate data into the new OS from backup. Be prepared for a surprise or two, as any number of things can go wrong.
 Nothing "OK" about this.... even Continue button is disabled
Backup isn't just for drive failure...
One big reason to create and maintain a proper backup has to do with OS upgrades, program installs and updates. If you make a full/complete/proper backup _BEFORE_ applying changes, you should have an "undo" option if something goes wrong or you find you can't tolerate the change (restore from backup). But, be advised, newest OS versions may not allow downgrading to a previous OS after install. Upgrade and there's no going back.
Potential problems and pitfalls
Excluding the entire Operating System from backup (after OS 14 Mojave) means downloading a new OS before restoring from backup. It also means the OS version you are allowed to download is left to Apple, which may not be as expected.
Booted in Recovery, the 'replace OS' option should show the same OS version you have (or had), but that's not always the case. Instead, you may see the very first OS your Mac shipped with (not good), or you may see the newest OS your Mac can run. Either way, your drive will be erased and the change will present problems.
Another issue is your internet connection: Unless you have blazing-fast fiber optic, downloading a new OS will take awhile, up to 18 hours for Ventura and later. Mojave was 6GB, Catalina was over 8GB, Monterey and later are well over 12GB. Plan accordingly.
 It has to be dependable and convenient.
If your Mac happens to have an unused drive bay (rare), use it. Otherwise, an external drive of sufficient capacity is necessary, Compact, pocket-sized 2.5" external backup drives like the one pictured here are
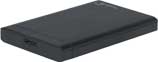 commonly available from most office stores. These external hard drives are powered thru USB connection. Pocket-sized SSDs are also available and may go well beyond 2TB HDD capacity. Seagate, Western Digital, SanDisk, PNY - get a quality, brand name drive. commonly available from most office stores. These external hard drives are powered thru USB connection. Pocket-sized SSDs are also available and may go well beyond 2TB HDD capacity. Seagate, Western Digital, SanDisk, PNY - get a quality, brand name drive.It bears repeating that if you are using Ventura OS or later, making a full/complete and bootable backup is no longer possible because OS is left behind, making backup to a drive little better than cloud backup (which may be the objective).
HARDWARE HALF of making a backup:    External drives may connect via FireWire (now discontinued), Thunderbolt, or the most common, USB and USB-C.
 FireWire 800 was backwards-compatible with 400 back in the day, and adapters are still available for old Macs (aka FireWire 9-pin to 6-pin). Firewire was abandoned in 2011 when replaced by Thunderbolt. External drives are available at office supply and electronics stores, or online. A good online source of drives and enclosures is New Egg, at newegg.com.
Enclosures for full-size desktop 3.5" hard drives are also available. Advantage here is a huge amount of storage in a single drive at reasonable cost. Down side is slow speed as compared to an SSD. 3.5" Drive capacities range from 1TB to 20TB and more. Some enclosures for these drives use a power brick, others have power adapters built-in. Some have fans, others cool by convection thru an aluminum case, and most will have internal SATA connectors. SCSI drives are still available, tho rarely used these days due to cost.
All backup drives will likely need to be formatted, and most include annoying utilities that you neither need nor want - erasing the drive and reformatting for your OS version will also get rid of those unnecessary files. 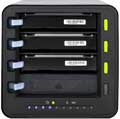 RAID arrays may be required for large space requirements, such as video storage. Pictured here is the business end of a 4-bay RAID array containing 3 full-size hard drives (the minimum RAID arrangement). RAID arrays (RAID = Redundant Array of Independent Disks) may be configured as backup and/or storage, or both, with up to 12 bays in a single enclosure - but be prepared for sticker shock. A good choice for video editing, enterprise server applications and more-than-normal storage requirements. Please note that RAID arrays require special formatting and setup that is beyond the scope of this discussion; a brief intro may be found on DriveSaver's blog, found here. RAID arrays may be required for large space requirements, such as video storage. Pictured here is the business end of a 4-bay RAID array containing 3 full-size hard drives (the minimum RAID arrangement). RAID arrays (RAID = Redundant Array of Independent Disks) may be configured as backup and/or storage, or both, with up to 12 bays in a single enclosure - but be prepared for sticker shock. A good choice for video editing, enterprise server applications and more-than-normal storage requirements. Please note that RAID arrays require special formatting and setup that is beyond the scope of this discussion; a brief intro may be found on DriveSaver's blog, found here.SOFTWARE HALF of making a backup: iCloud: As mentioned at top of this page, cloud backup has its limitations, but it's certainly better than nothing. If this is your choice, keep the nonsense to a minimum by using Apple's iCloud service. An iCloud account provides cost effective online backup and also allows you to synchronize your files across multiple computers, iPads, iPhones and Apple devices; the sync function of iCloud is useful for managing workgroups and multiple devices. If your equipment is up to date and you prefer online backup, give iCloud a go.
Be advised: There are bogus cloud "backup" services and software floating around out there that must be avoided. Know who you are dealing with before sending all your data out into space. Use Apple's iCloud. Time Machine: Apple addressed the need for backup by including their Time Machine backup utility with the MacOS, providing easy automation, once an external storage drive has been setup. Restoring your data from a Time Machine backup prior to OS 11 Big Sur is a piece o'cake. Later OS versions (Ventura+) requires downloading a new copy of your OS before migrating files from Time Machine backup. Because of this, we now prefer to use a clone app at the shop, like SuperDuper! or Carbon Copy Cloner for backup.
Carbon Copy Cloner: Drag-and-drop install, ease of use and a full compliment of automated features, CCC has everything necessary for reliable backup. Download is fully functional for a limited evaluation period and comes with a comprehensive user manual. Quick and reliable, its easy interface hides a sophisticated core that has matured over the years and kept pace with all the latest changes.
SuperDuper! From our friends at Shirt Pocket, SuperDuper has a clear and simple interface, quick and easy to use with an outstanding feature set at a very reasonable price. Still available for all older Systems, all the way back to PowerPC machines. Free to download, it can be used immediately; purchase and registration will unlock its full capability, including automated backup.
The rest is up to you.
Info above should get you started with backup and help along the way. By all means, make a backup plan if you don't have one already; if you do have a backup, keep it current, as it may well save your bacon some day. Note that backup from Ventura OS and later is not what it used to be, as mentioned above. If this is all too much to deal with, we'll be here to help.
|